Look, I get it. Not everyone can drop two grand on a gaming rig with the latest GPU and a processor that could probably launch rockets. I spent years gaming on a laptop that sounded like a jet engine and had the processing power of a caffeinated hamster. But here’s what I learned during those budget-constrained years—you don’t always need expensive hardware to enjoy smooth gameplay.
The secret? Knowing exactly which settings to tweak, what to sacrifice, and where to optimize. It’s about working smarter, not harder (or more expensively, in this case). Whether you’re running an old office PC that somehow runs games or a budget laptop from three years ago, there’s hope for achieving playable frame rates without the stuttering nightmare that makes competitive gaming impossible.
Best settings for smooth gameplay on low-end PCs involve a combination of in-game adjustments, Windows optimizations, and some lesser-known tricks that most guides never mention. I’m talking about the difference between unplayable 20 FPS slideshow experiences and smooth 60+ FPS gaming sessions that actually let you enjoy your favorite titles.
Ready to transform your potato into a slightly more capable potato? Let’s dive into the exact settings and optimizations that’ll give you the smoothest gameplay possible with the hardware you’ve got.
Understanding Your Hardware Limitations
Know What You’re Working With
Before we start cranking settings down to minimum, you need to understand what’s actually holding your system back. Not all low-end PCs struggle for the same reasons, and identifying your specific bottleneck saves time and frustration.
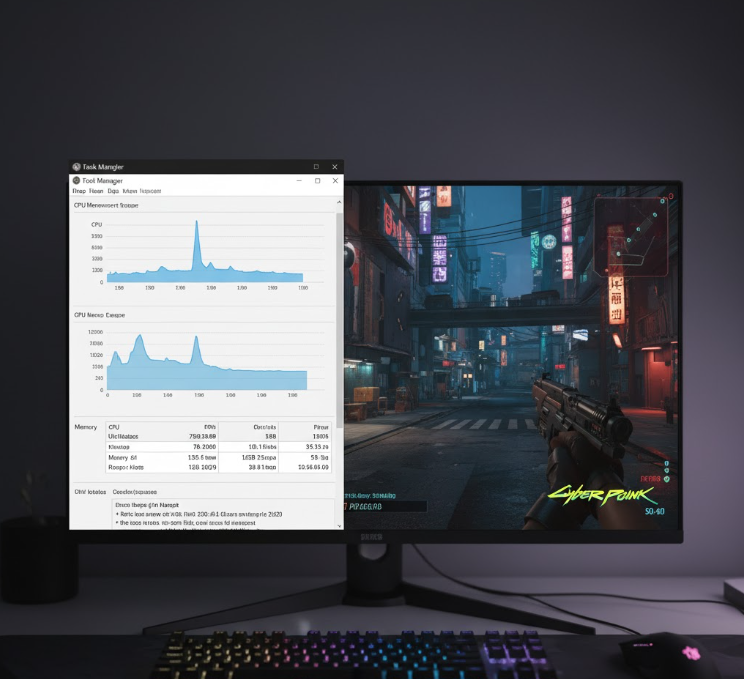
Here’s the reality check: open Task Manager while gaming (Ctrl + Shift + Esc) and watch what maxes out first. Is your CPU hitting 100% while your GPU chills at 60%? CPU bottleneck. GPU at 100% while CPU barely breaks a sweat? Graphics bottleneck. Both maxed out? You’re getting the full low-end PC experience.
RAM matters more than people think. If you’re running 4GB or less, you’re going to have a bad time with modern games. 8GB is the bare minimum for decent performance these days. When your RAM maxes out, your system starts using disk storage as memory (called paging), and trust me, that’s when things get ugly fast.
Your storage type makes a bigger difference than you’d expect too. If you’re still rocking a mechanical hard drive from 2015, loading times will be brutal and open-world games will stutter when streaming assets. You don’t need a fancy NVMe drive—even a cheap SATA SSD transforms the experience.
Here’s a quick reference for what constitutes a low-end PC in 2025:
| Component | Low-End Spec | What It Means |
|---|---|---|
| CPU | Intel i3 (8th gen or older) / AMD Ryzen 3 | Limited multi-threaded performance |
| GPU | GTX 1050 Ti or lower / Integrated graphics | Struggles with high textures and effects |
| RAM | 4-8GB | Minimal multitasking capability |
| Storage | HDD or small SSD | Slower asset loading and level streaming |
In-Game Settings That Matter Most
The Priority Hierarchy for Performance
Not all graphical settings impact performance equally. Some look fancy but barely touch your frame rate, while others look identical at low or high but crush your FPS. Let me break down what actually matters when configuring best settings for smooth gameplay on low-end PCs.
Resolution is king – This is your biggest performance lever. Running at 1080p when your hardware can barely handle 720p is self-sabotage. Yeah, 720p doesn’t look as crispy, but you know what looks worse? Stuttering at 25 FPS. Drop your resolution first, worry about pretty pixels later.
Shadows are frame rate killers – I cannot stress this enough. Shadows use complex rendering calculations that absolutely murder low-end hardware. Set them to low or off entirely. The visual difference is minimal when you’re focused on gameplay, but the performance gain is massive—we’re talking 20-30% FPS increases in some games.
Anti-aliasing is negotiable – AA smooths jagged edges but requires significant GPU power. Turn it off completely or use FXAA if the game supports it (it’s the least demanding option). Your game will look slightly rougher, but your frame rate will thank you.
Texture quality depends on your VRAM – Here’s where it gets tricky. If you’ve got 2GB VRAM or more, medium textures usually won’t hurt much. Below that? Go low. Exceeding your VRAM budget causes stuttering worse than low FPS because the system starts swapping textures from RAM, creating hitching.
Effects, post-processing, and motion blur? Off, off, and definitely off. Motion blur makes low frame rates look worse anyway. Particle effects and post-processing (bloom, depth of field, ambient occlusion) are pure luxury items your hardware can’t afford.
According to optimization guides from PC Gaming Wiki (pcgamingwiki.com), most games see 40-60% performance improvements from properly configured settings versus running default medium presets on low-end hardware.
Game-Specific Recommendations
Different engines and games respond differently to optimizations. Here’s what works for popular titles:
Battle Royale Games (Fortnite, Apex, Warzone) – These games prioritize competitive visibility. Use performance mode if available, disable shadows completely, keep textures low, and turn off all post-processing. Most pros run similar settings anyway for competitive advantage.
Competitive Shooters (Valorant, CS2, Rainbow Six) – Lower resolution, disable all eye candy, prioritize frame rate over everything. These games are about reaction time and precision—you need consistent FPS more than pretty lighting.
Open-World Games (GTA V, Elden Ring, Skyrim) – These are tougher on low-end hardware. Reduce draw distance significantly, use lower resolution, disable grass/foliage density settings. Consider mods that optimize performance (more on this later).
Esports Titles (League, Dota 2, Rocket League) – These games are generally well-optimized. You can usually maintain decent visuals while hitting high frame rates. Focus on disabling shadows and effects while keeping textures reasonable.
Windows Optimizations for Gaming Performance
Making Your OS Work for You, Not Against You
Your game settings are only half the battle. Windows loves running background processes that eat resources like they’re at an all-you-can-eat buffet. Time to put your OS on a diet.
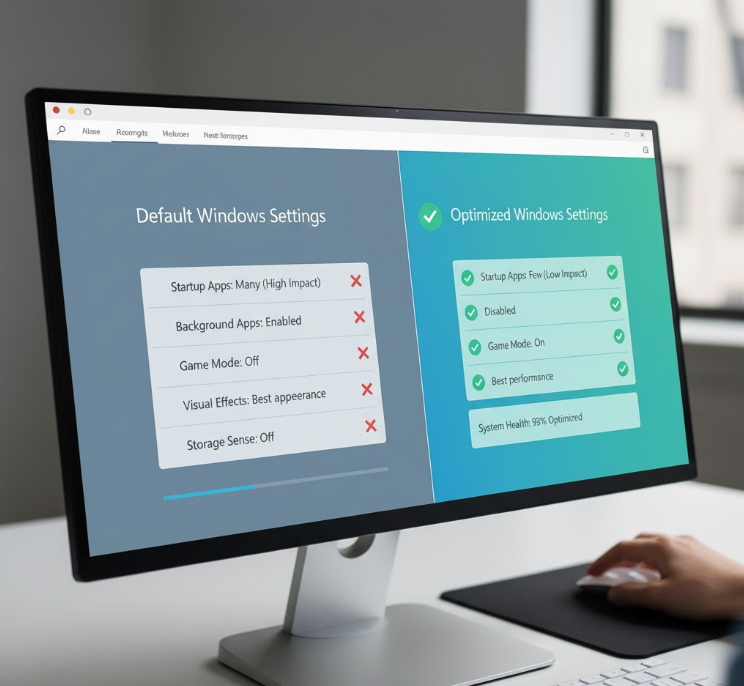
Disable Windows visual effects – Go to System Properties > Advanced > Performance Settings and select “Adjust for best performance.” Windows will look like it time-traveled from 2001, but your games will run better. You can selectively re-enable some effects if the aesthetic bothers you.
Game Mode is actually useful now – Windows Game Mode has improved significantly. Enable it through Settings > Gaming > Game Mode. It prioritizes system resources for your game and reduces background activity. Not a miracle worker, but every bit helps.
Power Plan matters – Open Power Options and switch to “High Performance” mode. The default “Balanced” plan throttles your CPU to save energy, which is the opposite of what you want while gaming. Your electricity bill might go up by like three dollars a month. Worth it.
Background apps are resource vampires – Close everything before gaming. Discord, Chrome with 47 tabs, Spotify, that random update service you forgot about—shut it all down. Use Task Manager to identify what’s running and kill anything non-essential. According to performance testing by Tom’s Hardware (tomshardware.com), closing background applications can recover 10-20% of system resources on budget hardware.
Disable startup programs – Hit Ctrl + Shift + Esc, go to Startup tab, and disable everything except essentials (audio drivers, graphics control panel). Programs launching at startup eat RAM and CPU cycles before you even open a game.
Advanced Windows Tweaks
For those willing to dig deeper into best settings for smooth gameplay on low-end PCs, here are some power-user optimizations:
Adjust paging file size manually – If you’re on 8GB RAM or less, set a custom paging file. Right-click This PC > Properties > Advanced System Settings > Performance Settings > Advanced > Virtual Memory. Set initial and maximum size to 1.5x your RAM amount. Prevents Windows from dynamically resizing it during gameplay (which causes stuttering).
Disable fullscreen optimizations – Right-click your game’s .exe file, go to Properties > Compatibility, and check “Disable fullscreen optimizations.” This prevents Windows from forcing borderless windowed mode, which adds input lag and can hurt performance.
Update your graphics drivers (properly) – Don’t just update through Windows Update. Go directly to NVIDIA or AMD’s website and download the latest drivers. Clean install using DDU (Display Driver Uninstaller) every few months to prevent driver bloat.
Disable Superfetch and Prefetch – These services predict what you’ll use and preload it, which sounds great but actually hurts on low-end systems. Type “services.msc” in Windows search, find Superfetch/SysMain and Prefetch, and disable them.
Graphics Card Control Panel Settings
NVIDIA and AMD Optimizations
Your GPU manufacturer’s control panel has settings that can squeeze extra performance from your hardware. Most people never touch these, but they’re goldmines for optimization.
NVIDIA Control Panel tweaks:
- Set “Power Management Mode” to “Prefer Maximum Performance”
- Change “Texture Filtering” to “High Performance”
- Set “Low Latency Mode” to “Ultra” (if supported)
- Disable “Vertical Sync” (enable in-game V-Sync only if screen tearing is unbearable)
- Set “Max Frame Rate” to your monitor’s refresh rate plus 3 (so 63 for 60Hz)
AMD Radeon Settings optimizations:
- Enable “Radeon Anti-Lag”
- Set Texture Filtering Quality to “Performance”
- Disable “Surface Format Optimization”
- Turn off “Radeon Chill” (contradictory to what it sounds like)
- Set tessellation mode to “Override application settings” at 8x or lower
These adjustments tell your GPU to prioritize frame rate over image quality, exactly what you need for smooth gameplay on limited hardware.
Software Tools for Performance Boost
Third-Party Solutions That Actually Help
Some programs are specifically designed to optimize gaming performance on low-end systems. Not all performance boosters are snake oil—these ones actually work.
Razer Cortex Game Booster – Free tool that automatically closes background processes and optimizes system resources when you launch games. It’s not magic, but the convenience factor is real. Does what you’d do manually, just automatically.
MSI Afterburner (with RivaTuner) – Essential for monitoring your performance in real-time. Shows FPS, CPU/GPU temps, usage percentages overlaid during gameplay. Understanding your bottlenecks is half the battle. You can also use it for mild overclocking if you’re feeling adventurous (do your research first).
Low Specs Experience – This program is specifically built for low-end gaming. It optimizes game configurations, reduces unnecessary background processes, and even has game-specific optimization packs. The free version gives you solid features; premium unlocks more game profiles.
Intelligent Standby List Cleaner (ISLC) – For systems with 8GB RAM or less, this tool prevents memory management issues that cause stuttering. It clears standby memory when it gets too full, preventing the performance hits that come with excessive paging.
BES (Battle Encoder Shirase) – Advanced users can limit CPU usage of specific programs. Useful when you need to run something in the background (like voice chat) but don’t want it stealing resources from your game.
Game-Specific Tweaks and Configuration Files
Going Beyond the Options Menu
Most games have hidden settings in their configuration files that aren’t exposed in the graphics menu. Editing these can unlock performance you didn’t know existed.
Configuration file locations:
- Most games store config files in Documents/[Game Name]
- Steam games often use: C:/Users/[Username]/AppData/Local/[Game Name]
- Some use: C:/Users/[Username]/Saved Games/[Game Name]
Common tweaks that work across many games:
- Reduce maximum pre-rendered frames to 1
- Disable dynamic lighting and reflection quality
- Lower LOD (Level of Detail) distance values
- Reduce shadow map resolution
- Disable ambient occlusion variations
Example: In many Unreal Engine games, you can edit GameUserSettings.ini to set values below what the in-game menu allows. Changing shadow quality from 0 to -1, or texture resolution from low to ultralow settings the UI won’t let you select.
Word of caution: Always backup original config files before editing. One typo can prevent your game from launching, and you’ll want that backup to restore functionality.
Network Optimization for Online Gaming
Because Lag Isn’t Just About Frame Rate
Smooth gameplay isn’t just about FPS—if you’re playing online, network performance matters just as much. High ping and packet loss make even 144 FPS feel terrible.
Use ethernet, not WiFi – I know this is obvious, but seriously, plug in. WiFi adds latency and inconsistency that makes competitive gaming frustrating. If ethernet isn’t possible, get as close to your router as possible and make sure you’re on 5GHz band.
Close bandwidth-hungry applications – Streaming services, torrents, browser tabs with video—they compete for bandwidth. Close them while gaming. Even background Windows Updates can cause lag spikes.
QoS (Quality of Service) settings on your router – If your router supports QoS, configure it to prioritize gaming traffic. This ensures your gaming packets get priority over other household internet usage. Check your router’s manual for specific instructions.
Change DNS servers – Windows default DNS can be slow. Switch to Google DNS (8.8.8.8 / 8.8.4.4) or Cloudflare DNS (1.1.1.1 / 1.0.0.1) for potentially lower latency and faster server connections.
Maintaining Your System for Consistent Performance
Long-Term Optimization Habits
Getting smooth gameplay once is great. Maintaining it requires some regular housekeeping that most people skip.
Clean your PC physically (if desktop) – Dust buildup causes overheating, which triggers thermal throttling, which tanks your performance. Every 3-4 months, open your case and blow out the dust with compressed air. Focus on fans, heatsinks, and vents.
Monitor temperatures – Use HWMonitor or MSI Afterburner to track temps. If your CPU/GPU hits 85-90°C during gaming, you’re thermal throttling. Clean your PC, improve airflow, or reapply thermal paste if you’re comfortable doing so.
Uninstall games you don’t play – Full storage drives (especially HDDs) perform worse than drives with free space. Keep at least 20% of your drive empty for optimal performance.
Run disk cleanup regularly – Windows accumulates temporary files, cache, and junk that wastes space and can slow things down. Use built-in Disk Cleanup or third-party tools like CCleaner (carefully—don’t use registry cleaners).
Defragment HDDs (but not SSDs) – If you’re on a mechanical drive, defragment monthly using Windows’ built-in tool. Never defragment SSDs—it wastes write cycles and provides zero benefit.
When Optimization Isn’t Enough
Knowing Your Limits and Budget Upgrades
Sometimes you’ve optimized everything possible and performance still isn’t where you need it. That’s when it’s time to consider the most cost-effective hardware upgrades.
RAM upgrade is the best bang for buck – Going from 4GB to 8GB, or 8GB to 16GB, provides immediate, noticeable improvements. It’s usually the cheapest and easiest upgrade. Make sure you check compatibility with your motherboard first.
Add an SSD if you’re on HDD – A 240GB SSD for your OS and main games costs under $30 now and transforms the experience. Keep the HDD for mass storage, put your games on the SSD.
Used GPU market is your friend – Last-gen graphics cards lose value fast. A used GTX 1650 or RX 570 costs way less than current-gen equivalents and provides massive upgrades over integrated graphics or really old GPUs.
CPU upgrades are trickier – Usually require motherboard compatibility research. Often not worth it unless you’re changing platform entirely. Prioritize RAM and GPU first.
According to market analysis from PC Part Picker (pcpartpicker.com), the average cost to bring a truly low-end PC to mid-tier gaming capability sits around $200-300 with strategic used part purchases, significantly less than building new.
Conclusion
Achieving best settings for smooth gameplay on low-end PCs isn’t about finding one magic setting that solves everything. It’s about understanding your hardware limitations, systematically optimizing every layer of your system, and making smart compromises between visual quality and performance.
Start with the biggest impact changes: lower your resolution, kill those shadows, close background applications, and optimize your Windows settings. Then dive deeper with graphics control panel tweaks, configuration file editing, and performance monitoring tools. Each optimization adds up, transforming unplayable slideshow experiences into genuinely smooth gaming sessions.
I’ve used these exact techniques to play modern games on hardware that had no business running them. That old laptop I mentioned? Got three more years of gaming out of it using these optimizations before finally upgrading. You’d be amazed what’s possible when you stop trying to run everything on high and start focusing on what actually matters—consistent, smooth frame rates that let you enjoy the games you love.
The beautiful thing about PC gaming is the control you have. Console players get what they get. You? You can tweak, optimize, and customize until you find that perfect balance between performance and acceptability. It takes some effort and experimentation, but the payoff is worth it.
What’s been your biggest performance gain from optimization? Any tricks I missed that worked wonders for your low-end setup? Drop a comment below—I’m always looking for new optimization techniques to try, and I’d love to hear what’s working for you.
Now stop reading and go optimize that rig. Those games aren’t going to run themselves smoother.
FAQ: Best Settings for Smooth Gameplay on Low-End PCs
What FPS should I aim for on a low-end PC?
For smooth gameplay, target a consistent 60 FPS minimum for single-player games and 60+ for competitive multiplayer titles. If achieving 60 FPS requires settings so low the game becomes unplayable visually, aim for a locked 30 FPS instead—consistency matters more than peak numbers. Variable frame rates between 30-50 feel worse than locked 30 FPS due to inconsistent frame timing.
Should I use V-Sync on a low-end PC?
Generally no. V-Sync prevents screen tearing but adds input lag and can cause stuttering when your frame rate drops below your monitor’s refresh rate. If screen tearing bothers you significantly, enable V-Sync in-game rather than through your graphics control panel, or use adaptive sync if your monitor supports it. Most competitive gamers disable V-Sync regardless of hardware.
How much does lowering resolution actually help performance?
Lowering resolution provides the biggest single performance boost available. Dropping from 1080p to 900p can give 20-30% FPS increases, while going to 720p can nearly double frame rates on severely limited hardware. The visual trade-off is noticeable but worth it for smooth gameplay. You can compensate somewhat by increasing sharpness filters if your game supports them.
Can overclocking my low-end PC improve gaming performance?
Overclocking can provide 5-15% performance improvements, but comes with risks on low-end hardware with potentially inadequate cooling. If you have proper cooling and are willing to research your specific hardware’s safe overclocking limits, it can help. Start conservatively, monitor temperatures carefully, and never push voltages on budget hardware. For most users, software optimizations provide better risk-reward ratios.
What’s the single most important upgrade for low-end gaming PCs?
For most low-end systems, RAM is the best first upgrade, particularly moving from 4GB to 8GB or 8GB to 16GB. However, if you’re using a mechanical hard drive, adding even a small SSD for your OS and main games transforms the entire experience with faster loading and reduced stuttering. The “best” upgrade depends on your specific bottleneck—use Task Manager while gaming to identify what maxes out first.
Sources:
- PC Gaming Wiki (pcgamingwiki.com) – Game-specific optimization guides and configuration tweaks
- Tom’s Hardware (tomshardware.com) – Hardware performance testing and optimization research
- PC Part Picker (pcpartpicker.com) – Hardware compatibility and pricing data